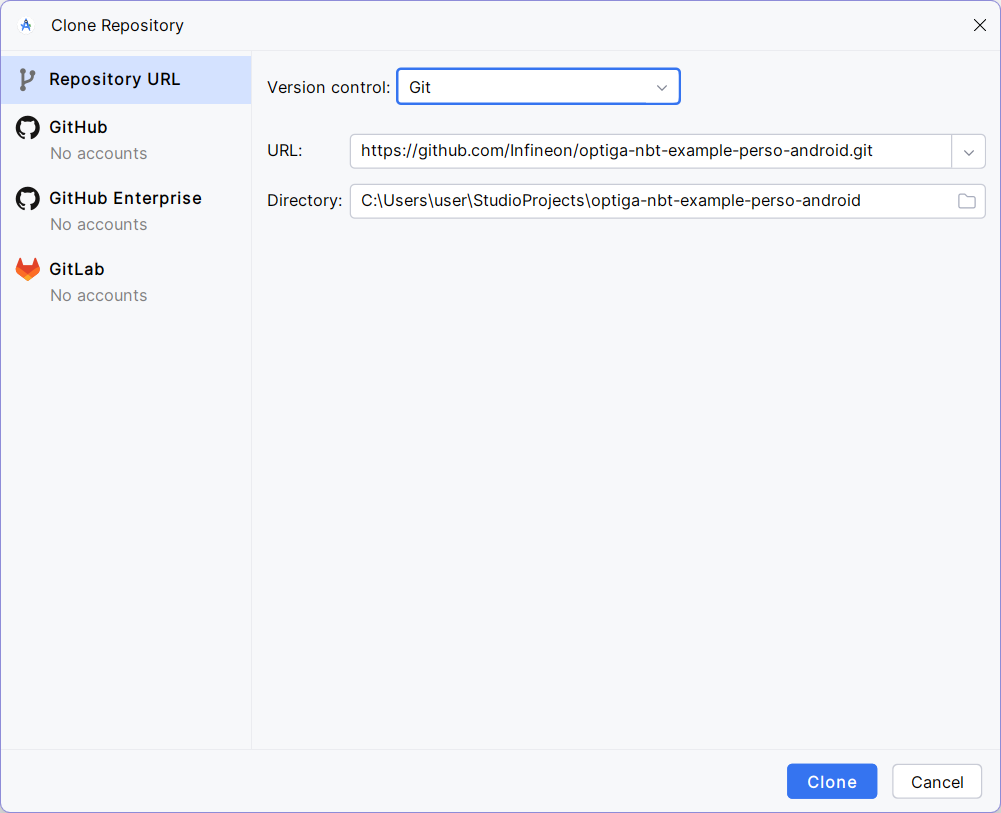
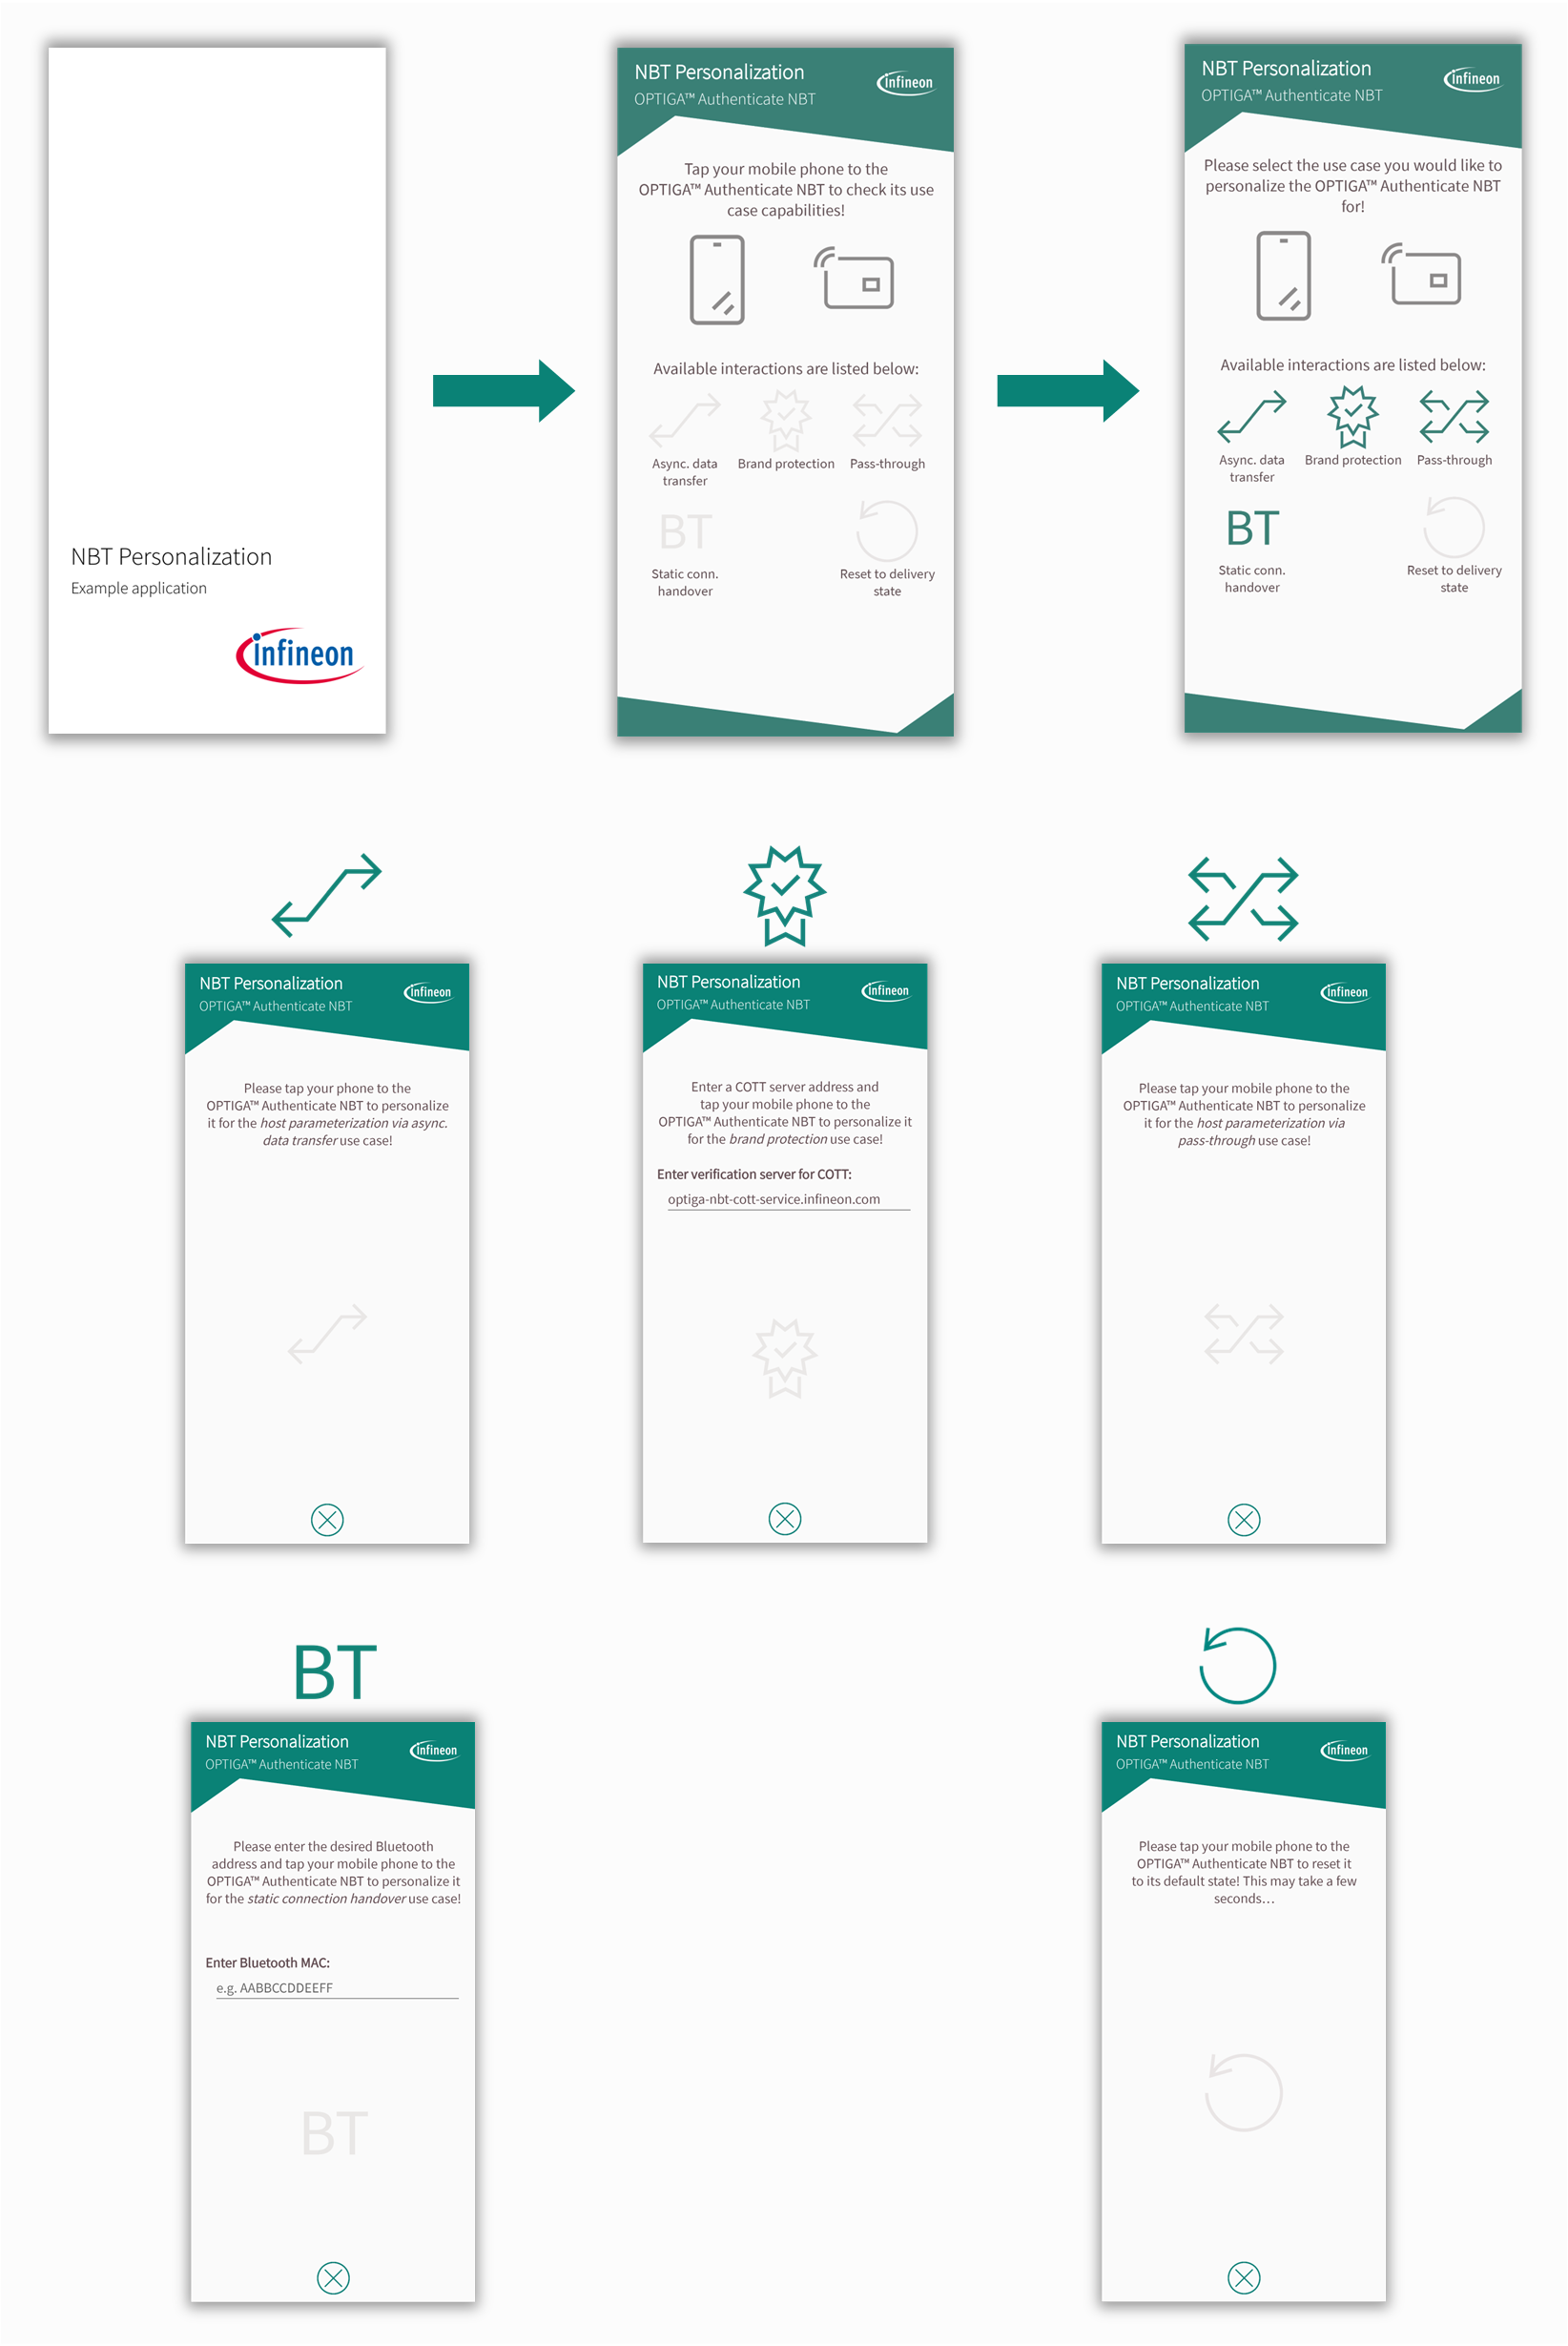
This guide shows the single steps to install the NBT Personalization mobile phone app
which is utilizeded by other use cases. The scope is the evaluation of the OPTIGA™ Authenticate NBT Development
Kit with
an Android-based mobile phone.
Connect your Android mobile phone to your PC via USB [2]
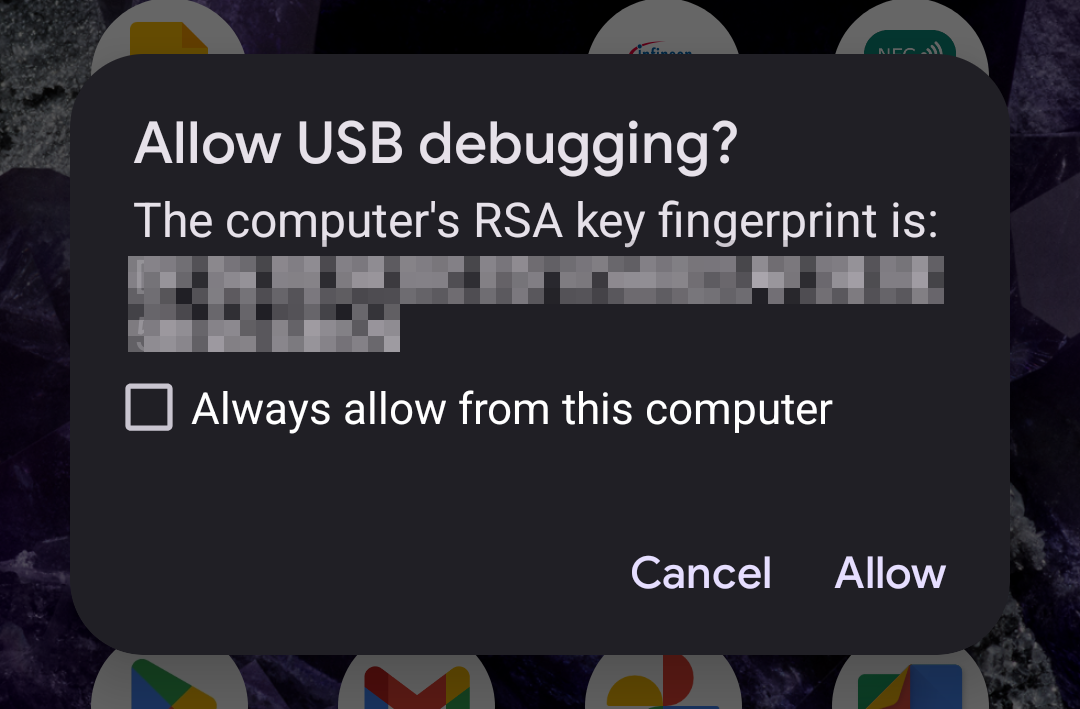
Once your phone is connected, it should prompt you to allow USB debugging (Developer options enabled). This has to be enabled!
Fig. 128 Pop-up on the phone to allow USB debugging.
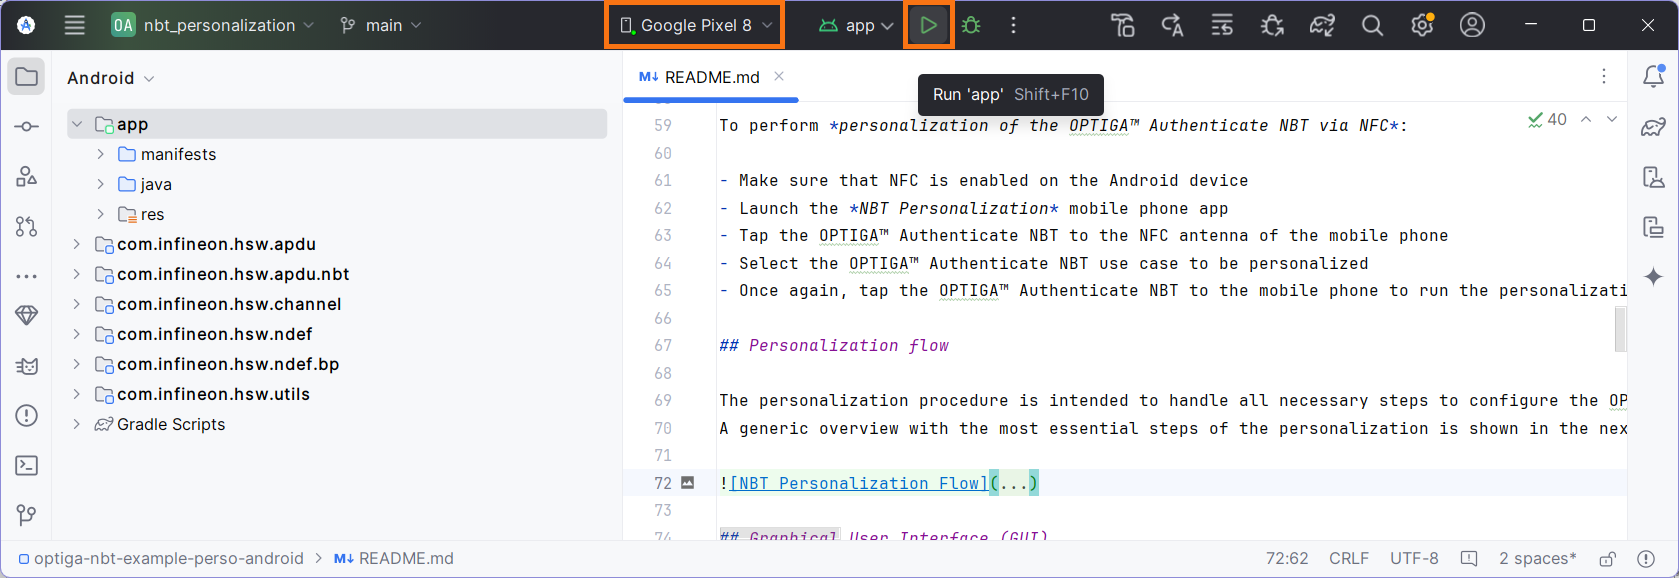
In Android Studio at the top you should see your mobile phone. Next to it, select Run'app' to build the app. It is now installed on the physical device and you can run it.
Alternatively, the .APK of the app can also be manually build, transferred to the mobile phone and installed there.
In Android Studio the .APK can be built via Build -> Build App Bundle(s) / APK(s) -> Build APK(s).
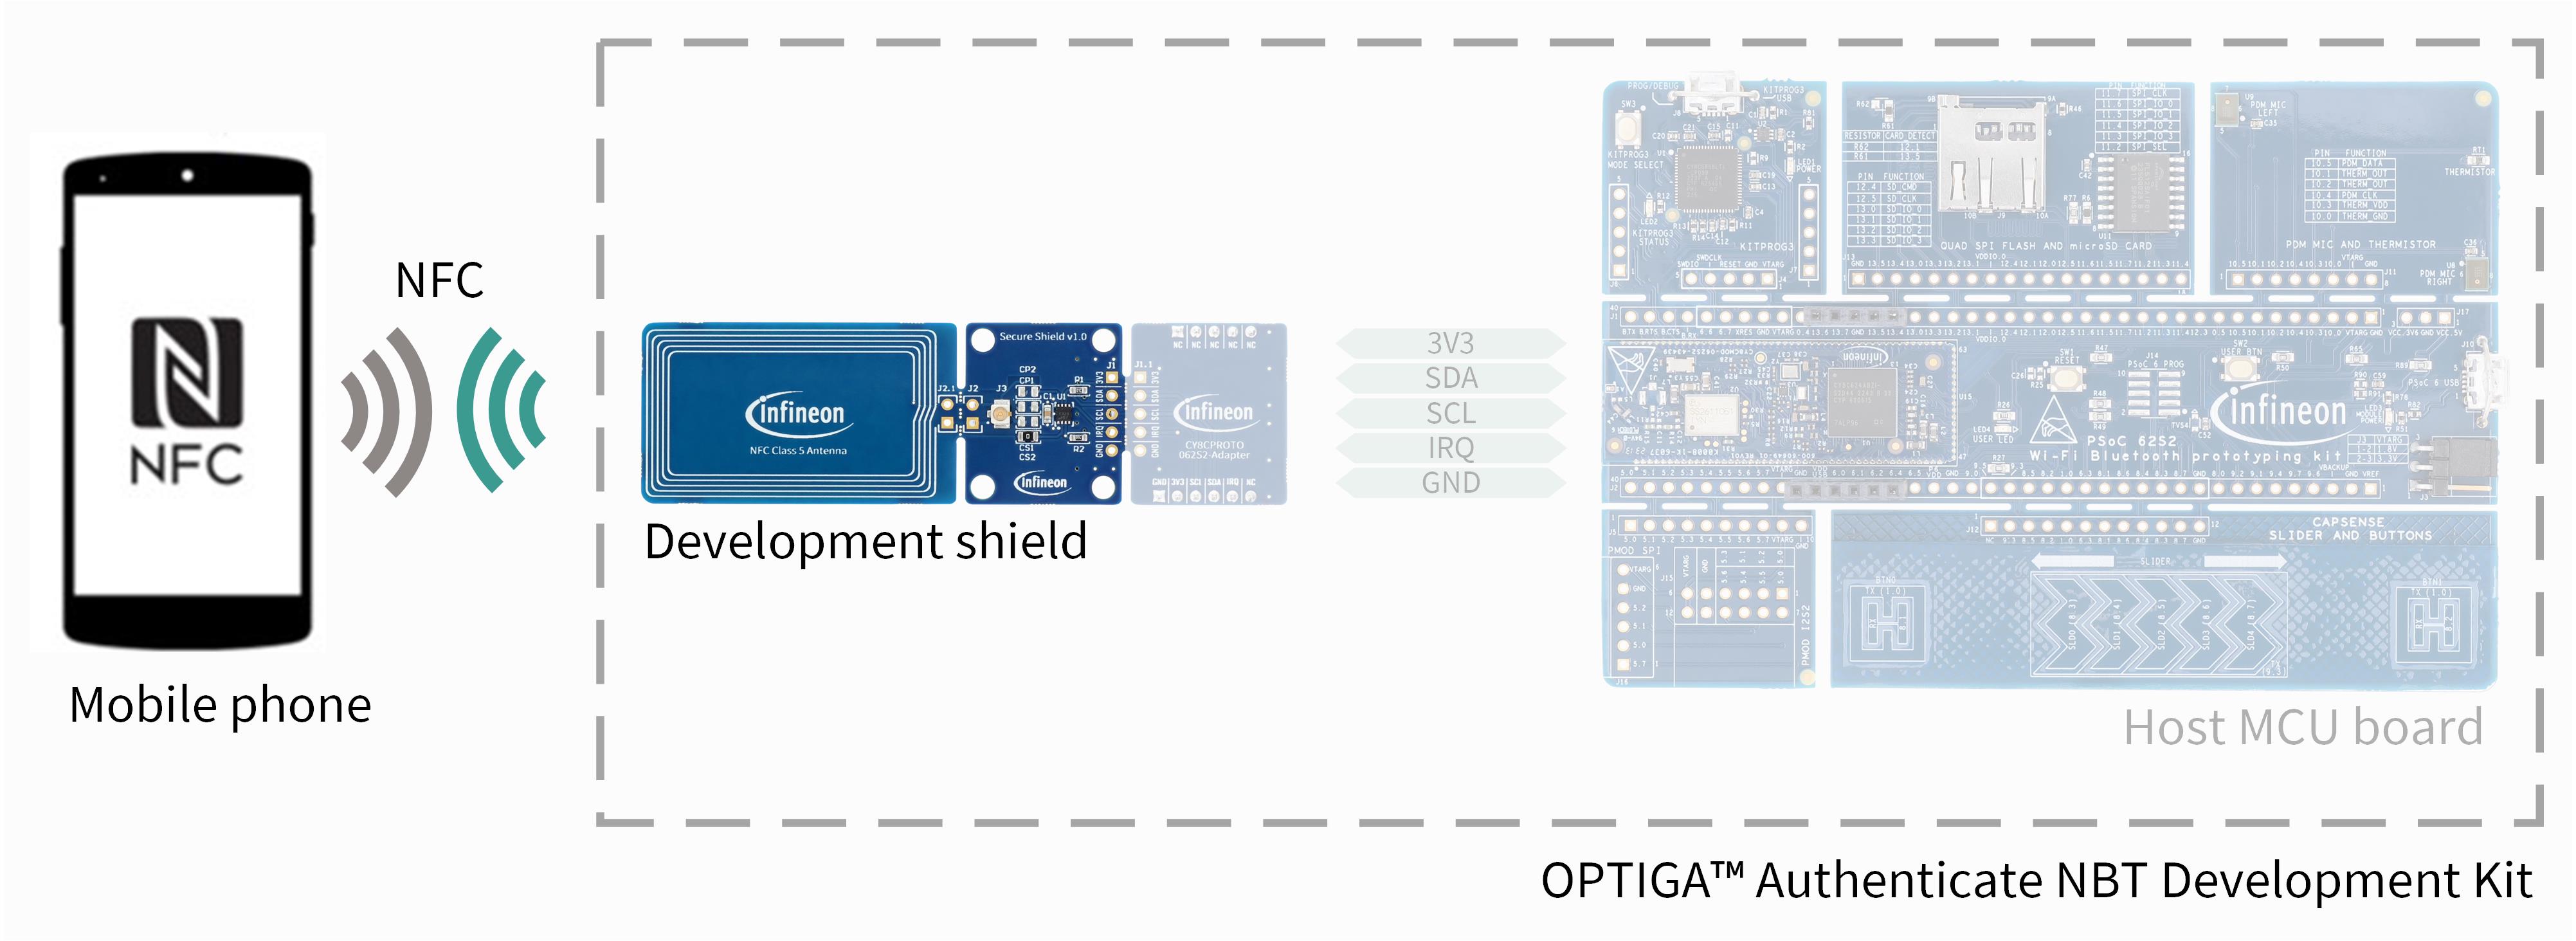
The main configuration for this use case is the NFC-only tag setup (for
personalization and operation). Even though the NBT can be connected to a host
MCU via I2C, this is not required for the operation of this use case. So the
shield can be used standalone (not plugged into the host MCU board).
Fig. 130 Hardware setup for evaluation of this use case.
The mobile phone needs the NBT Personalization mobile phone app installed.
The NBT Personalization mobile phone app can be used to reset the device to
pseudo default state before performing the use-case-specific personalization.
During this step, the NDEF file’s content
is cleared and the file access policies are set to the default values. The
content of the proprietary files is not touched.
For the provided use cases including embedded applications, the personalization is implicitly performed via I2C during the startup of the application.
In that case, dedicated personalization via the NBT Personalization mobile phone app is not required.