Operation
This section describes the system composition for the evaluation of the OPTIGA™ Authenticate NBT with the ADT example applications (during operation). It provides the design details and the core methodology used in the example applications for this use case.
Beforehand, the OPTIGA™ Authenticate NBT needs to be configured accordingly (see Personalization for details) as this use case will use the chip’s proprietary files to asynchronously transfer a desired state of the USER LED to the host MCU board.
System architecture
In this implementation of the ADT use case, the OPTIGA™ Authenticate NBT acts as an asynchronous NFC-to-I2C bridge between the mobile phone and the host MCU board, which is connected via I2C. The used hardware and software components for this use case will be covered in detail below.
Hardware
For the demonstration of the use case, a mobile phone and the OPTIGA™ Authenticate NBT Development Kit are needed. The development shield has to be attached to the pre-soldered pin sockets of the host MCU board. This connects the power supply (3V3, GND) and the I2C pins (SDA, SCL). Even tough the IRQ pin is connected, it is not actively utilized in this use case’s example applications.
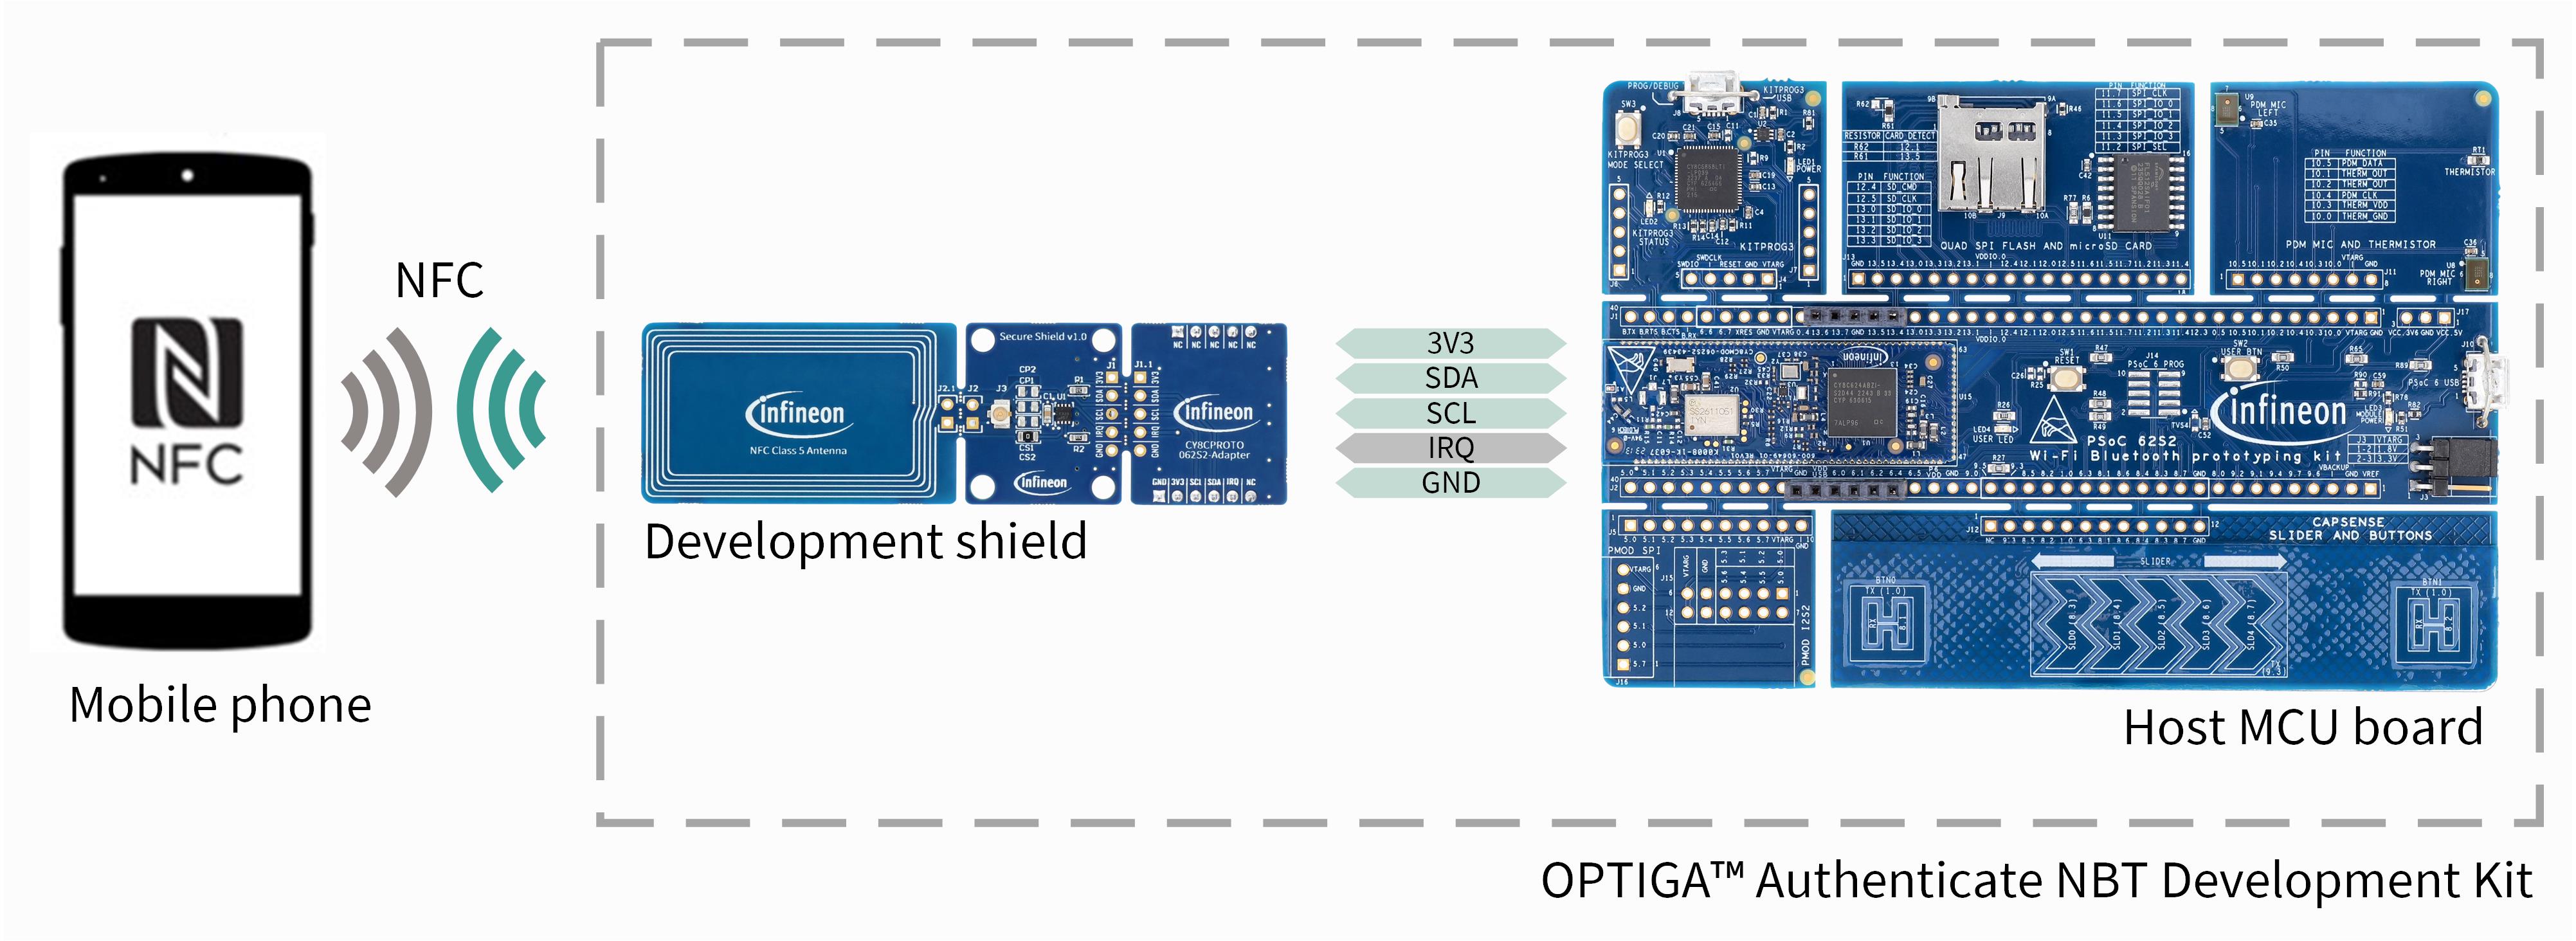
Fig. 62 Hardware components for operation.
Software
The involved software divides into the mobile phone app (Android or iOS), the application(s) running on the OPTIGA™ Authenticate NBT, and the embedded application (running on the PSOC™ host board). The following figure shows an overview of the involved software components:
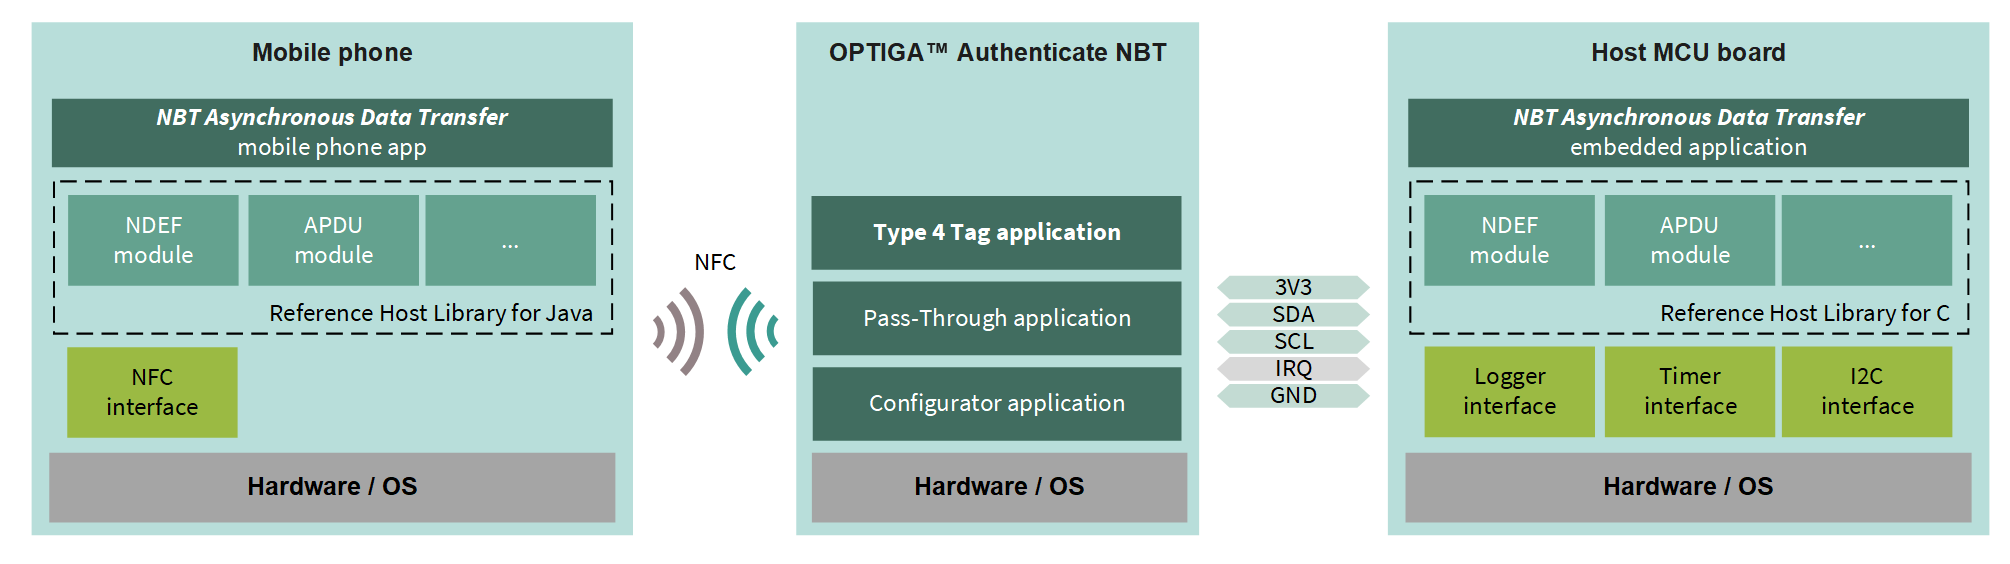
Fig. 63 Software architecture of the included applications for the operational use case.
The mobile phone and embedded applications are provided as source code via GitHub (see Software requirements). They are considered off-chip software, which means they can be modified and recompiled.
In contrast, the NBT applications are considered on-chip software, pre-flashed on the device and not alterable. The operational flow utilizes only the Type 4 Tag application of the OPTIGA™ Authenticate NBT’s on-chip applications. Refer to the extended datasheet for more information about the on-chip applications.
Operational flow
The example implementation of this use case involves the control of an LED via NFC. The application flow of writing and reading the LED status as well as design details can be found below.
Write LED status
To write the LED status via ADT, Write to device has to be selected on the
mobile phone app and the LED target state has to be set. When tapping the phone
to the OPTIGA™ Authenticate NBT’s NFC antenna, it initiates an NFC communication
and stores the LED status in FILE_1 of the OPTIGA™ Authenticate NBT (see
Data encoding). After pressing the user button, the host MCU will
select the T4T Application via the I2C interface, read the stored LED status
from FILE_1 and set the USER LED accordingly.
To provide a confirmation that the write was successful, the MCU
writes the LED status back to FILE_2 via I2C, which may later be read
by the mobile phone to check whether the LED was successfully updated.
The following figure depicts the command flow of an asynchronous data
transfer mode.
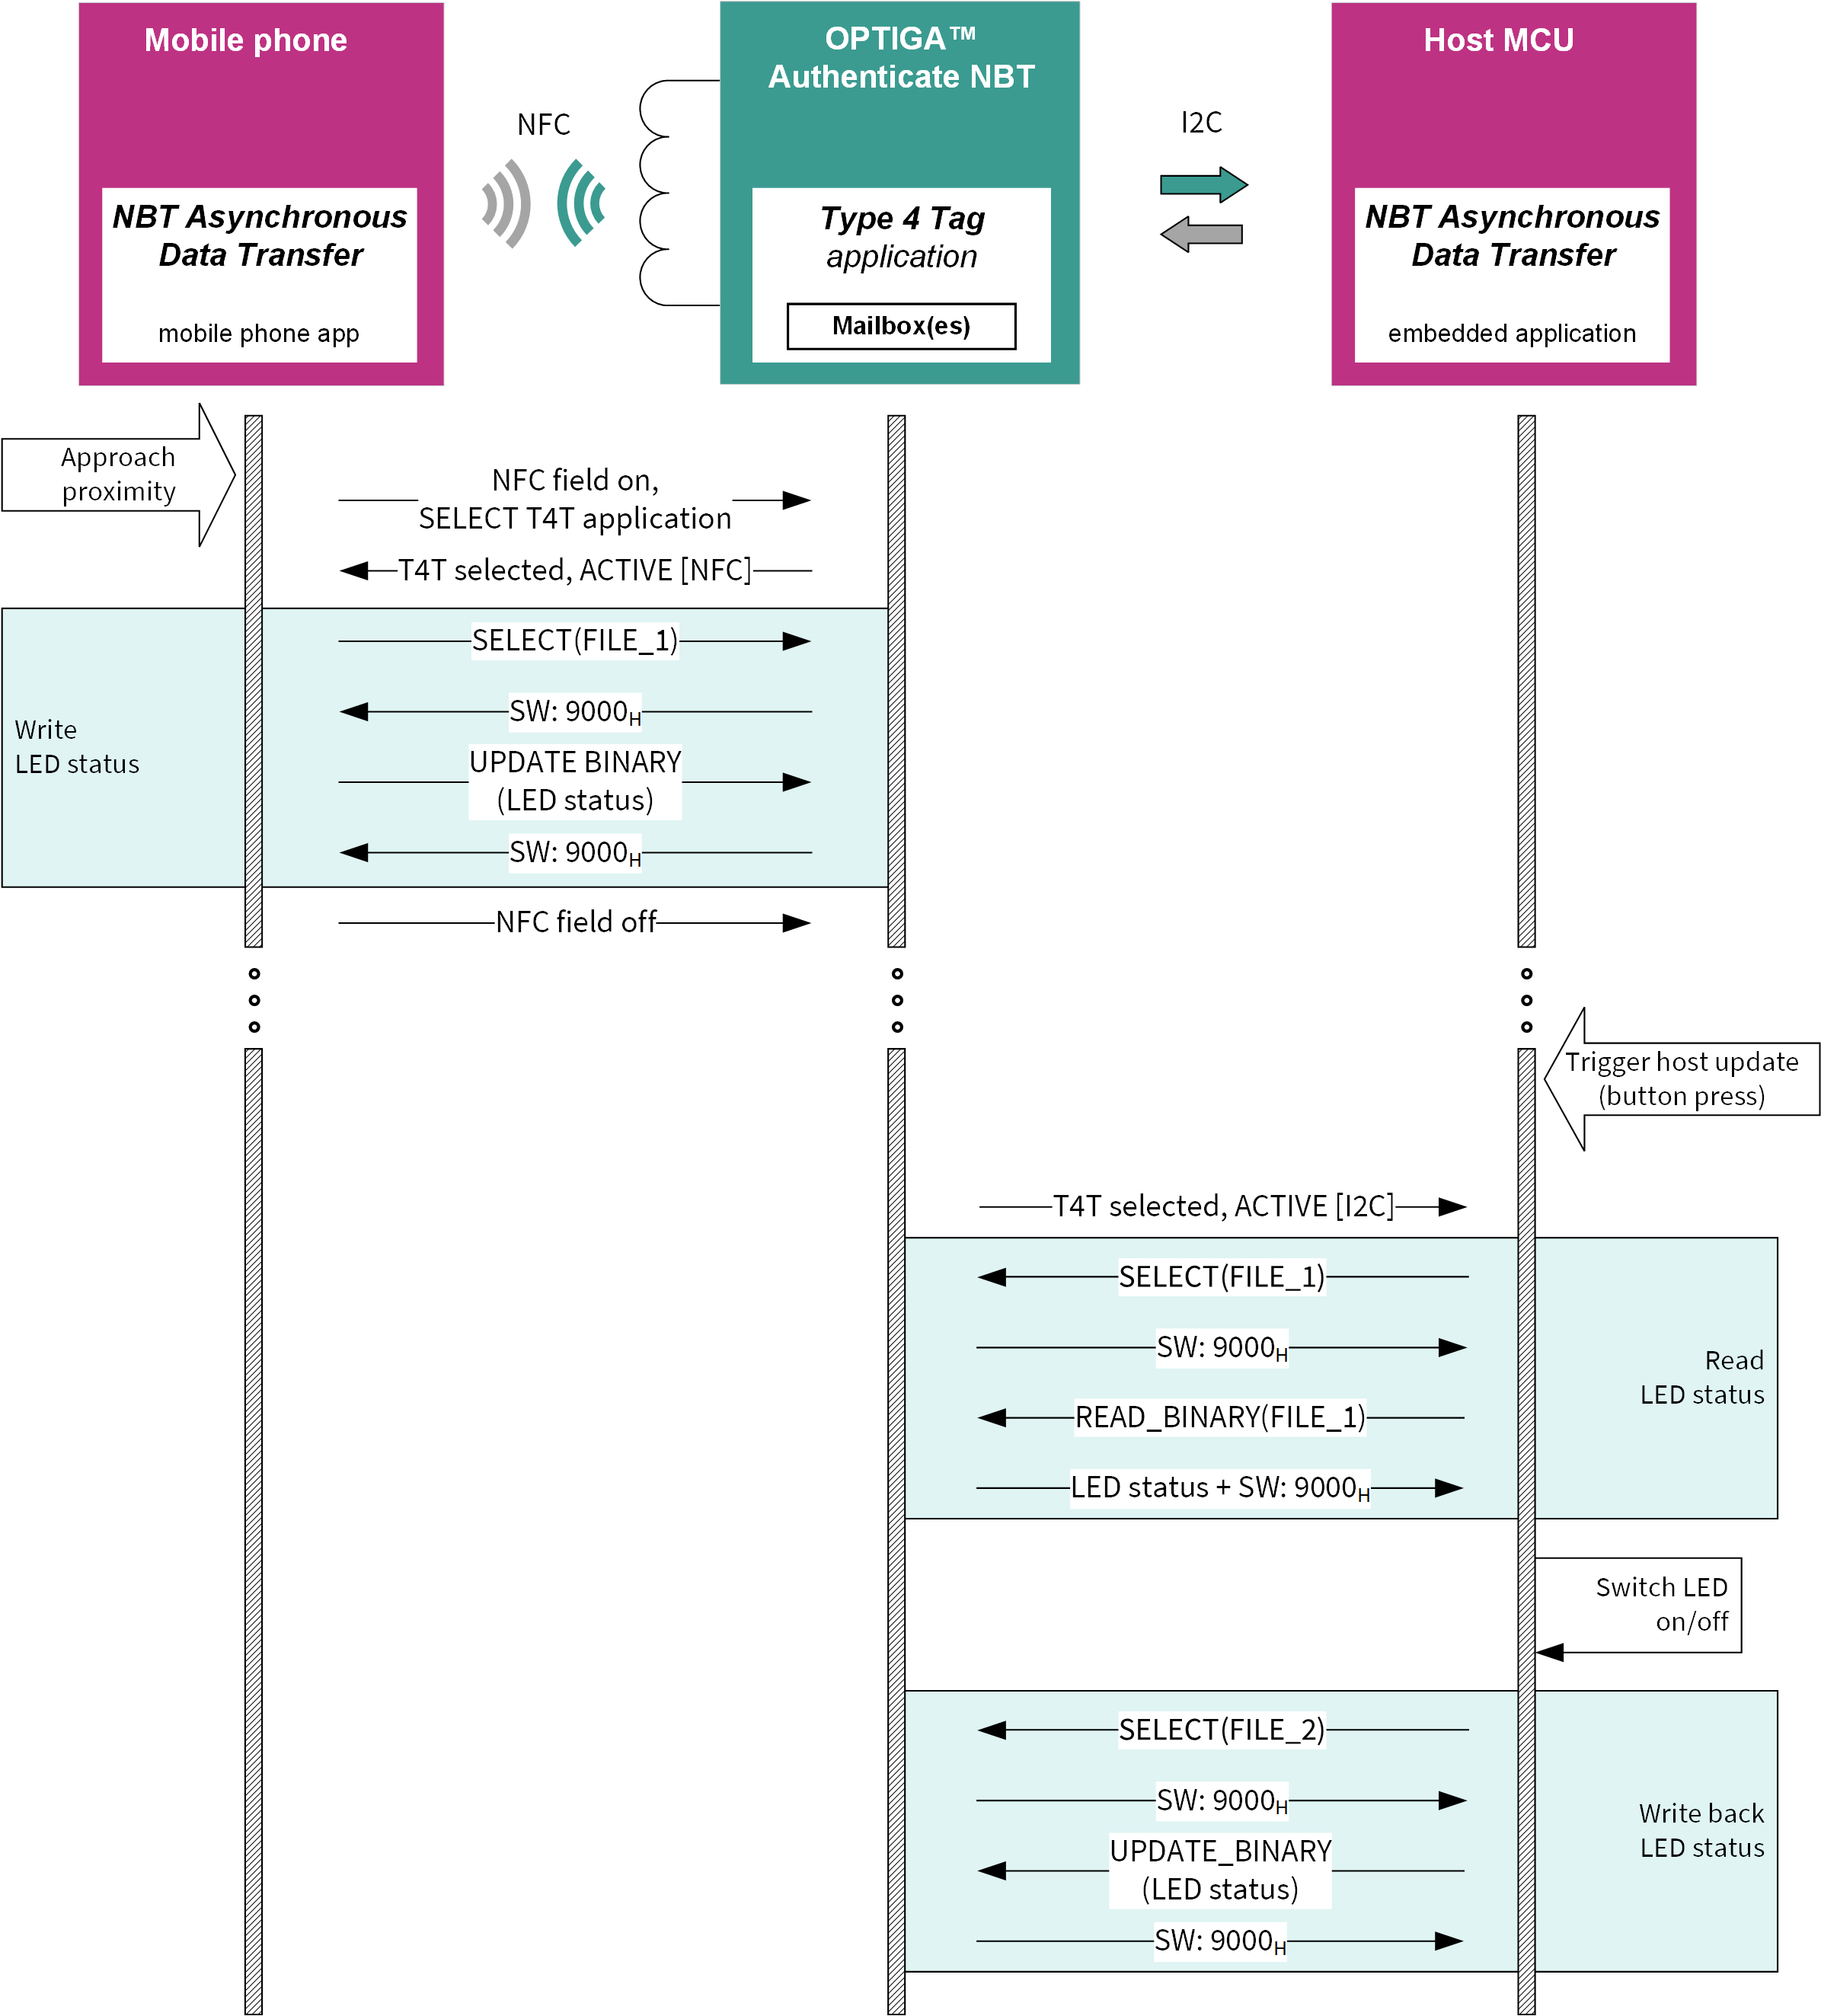
Fig. 64 Writing the state of the LED.
Read LED status
To read the LED status via ADT, Read from device has to be selected on
the mobile phone app. When tapping the phone to the OPTIGA™ Authenticate
NBT’s NFC antenna, it initiates an NFC communication and reads the LED
status, stored in FILE_2 of the OPTIGA™ Authenticate NBT (see
Data encoding). This status is then visualized accordingly in
the mobile phone app.
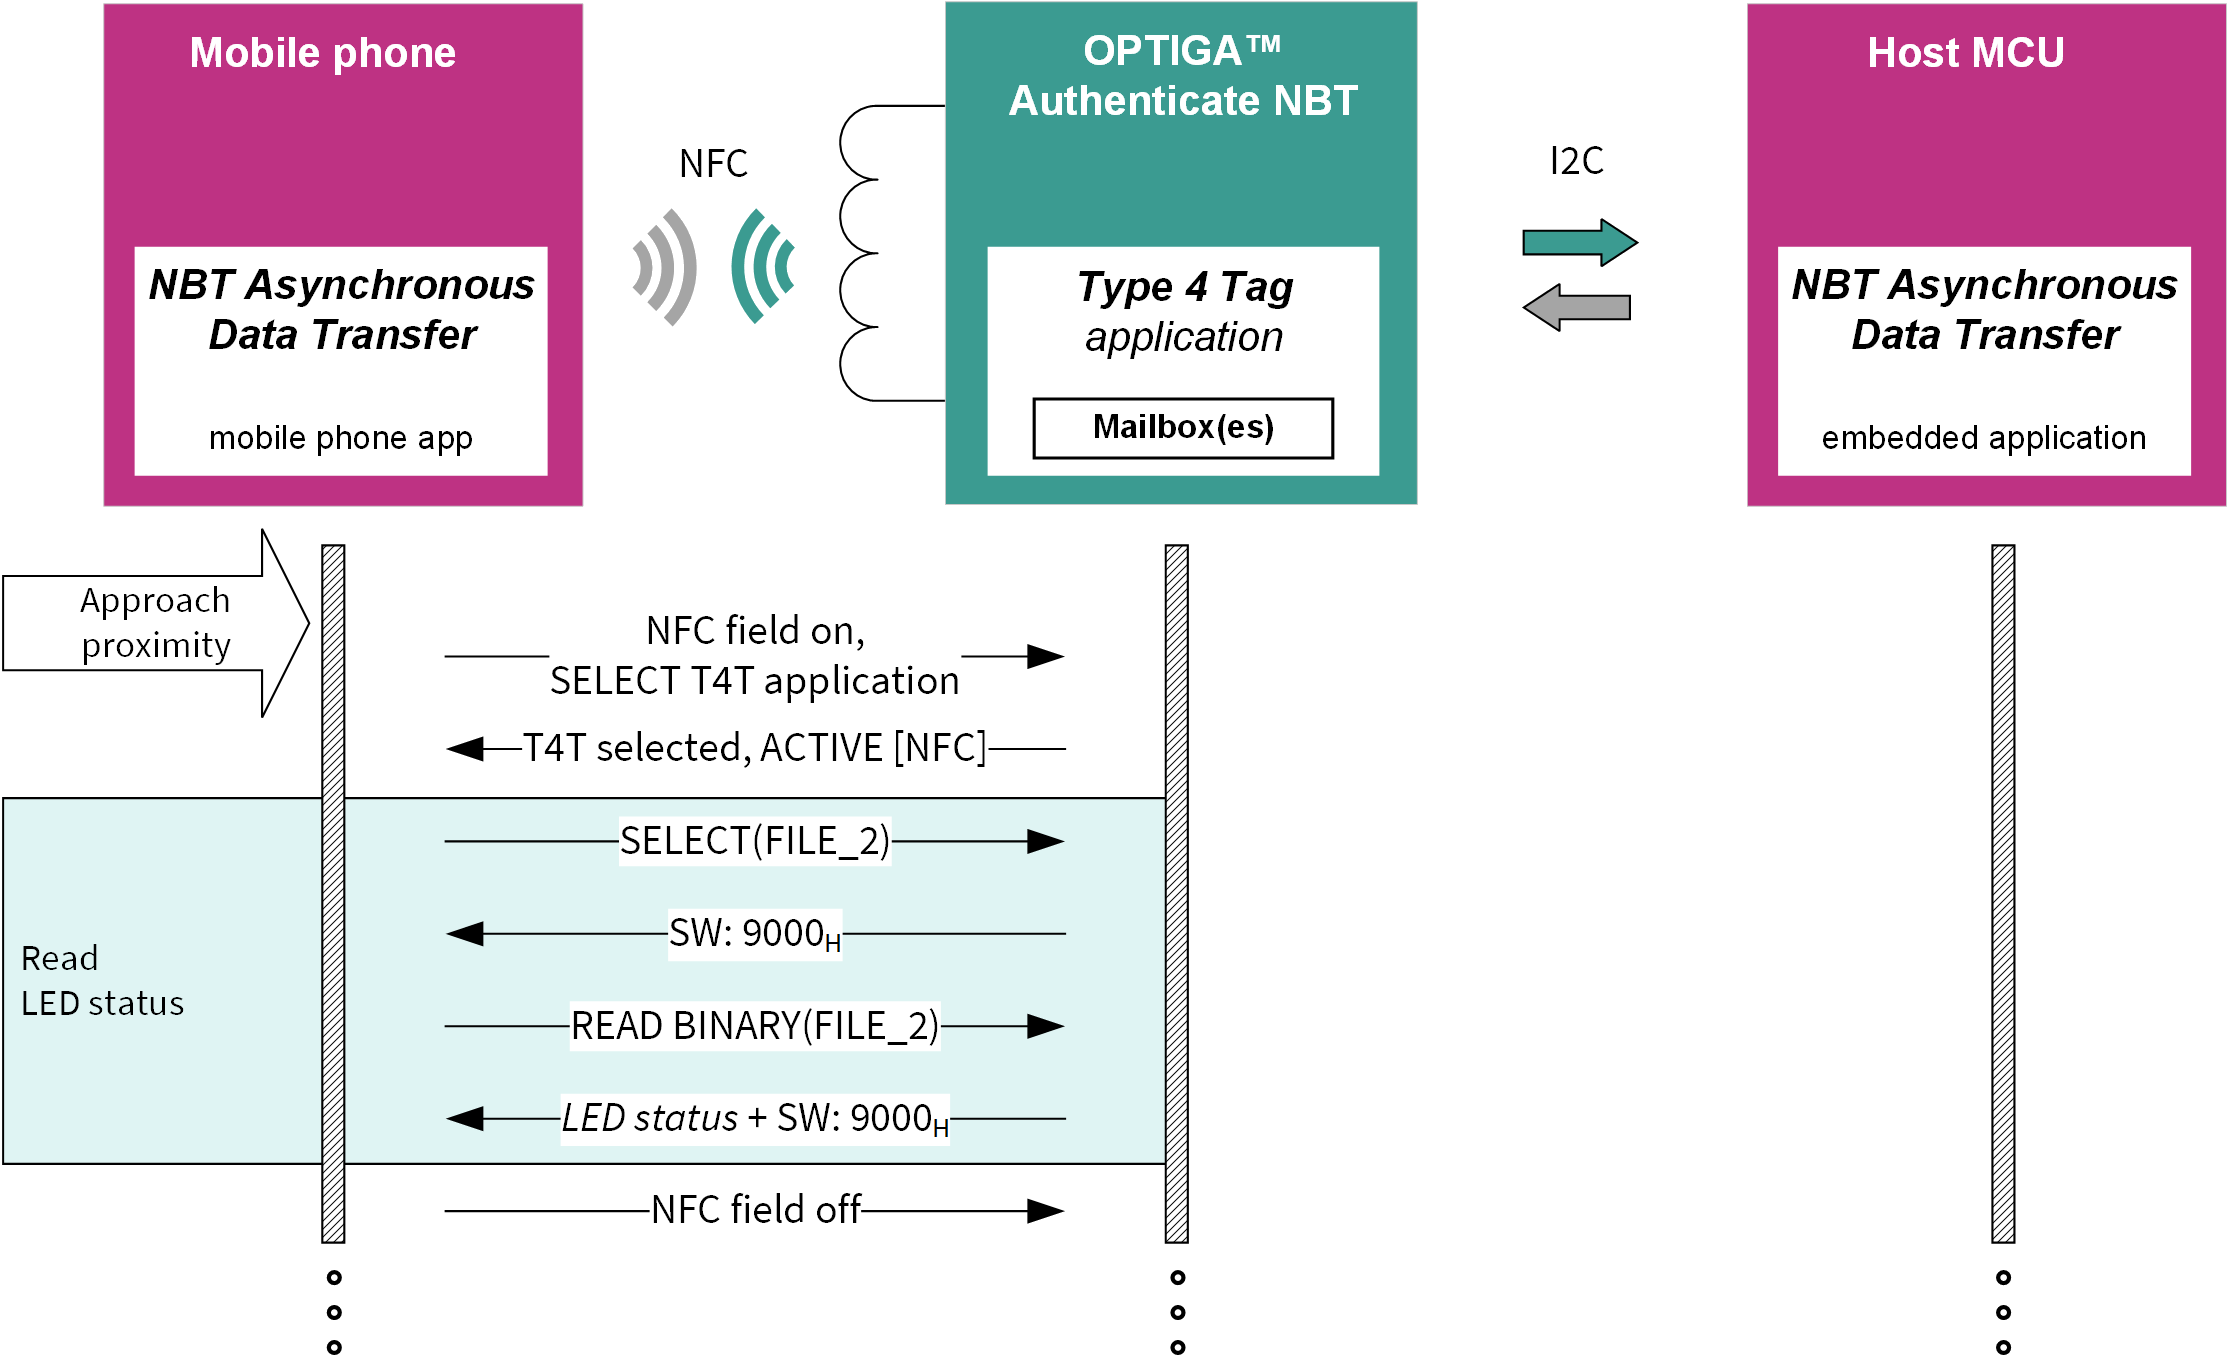
Fig. 65 Reading the state of the LED.
Design details
Describes the core design principles used for the implementation of the applications to demonstrate this use case. Additionally, cross-application definitions are stated here.
Proprietary files as mailboxes
The OPTIGA™ Authenticate NBT provides multiple proprietary files which
can be accessed via the device’s T4T Application. This contains the
four proprietary files (FILE_1 to FILE_4), as well as the NDEF,
EF.FAP, and EF.CC files[*]. These files can be used as mailboxes
for data transfer between two actors. The data is stored in the file via one
actor and remains there until the other actor collects it. The proprietary
file FILE_1 is used to transfer the LED status from the mobile phone to
the MCU, while FILE_2 is used for the other direction.
Data encoding
LED on |
|
LED off |
|
Pin mapping
Development shield |
MCU |
Function |
|---|---|---|
SDA |
P6.1 (CYBSP_I2C_SDA) |
I2C data |
SCL |
P6.0 (CYBSP_I2C_SCL) |
I2C clock |
IRQ |
P6.2 |
Interrupt |
3V3 |
VDD |
Power and pad supply (3V3) |
GND |
GND |
Common ground reference |