GUI Reference
This section explains how to use the GUI in details.
Main GUI
In the image below, the APP main GUI is shown
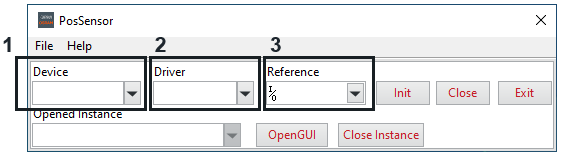
To start a connection with a sensor, do the following
Select a device.
Select a driver.
Select the com-port for the driver.
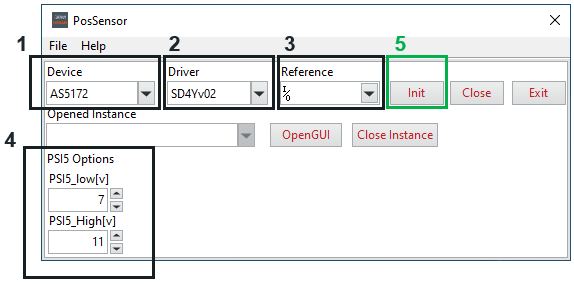
For some Device/Driver combinations, there will be optional settings.
Click Init.
Dev GUI
After successful initialization of the driver, a new windows popup will appear. It is called Device GUI
The Device GUI is shown in the image below:
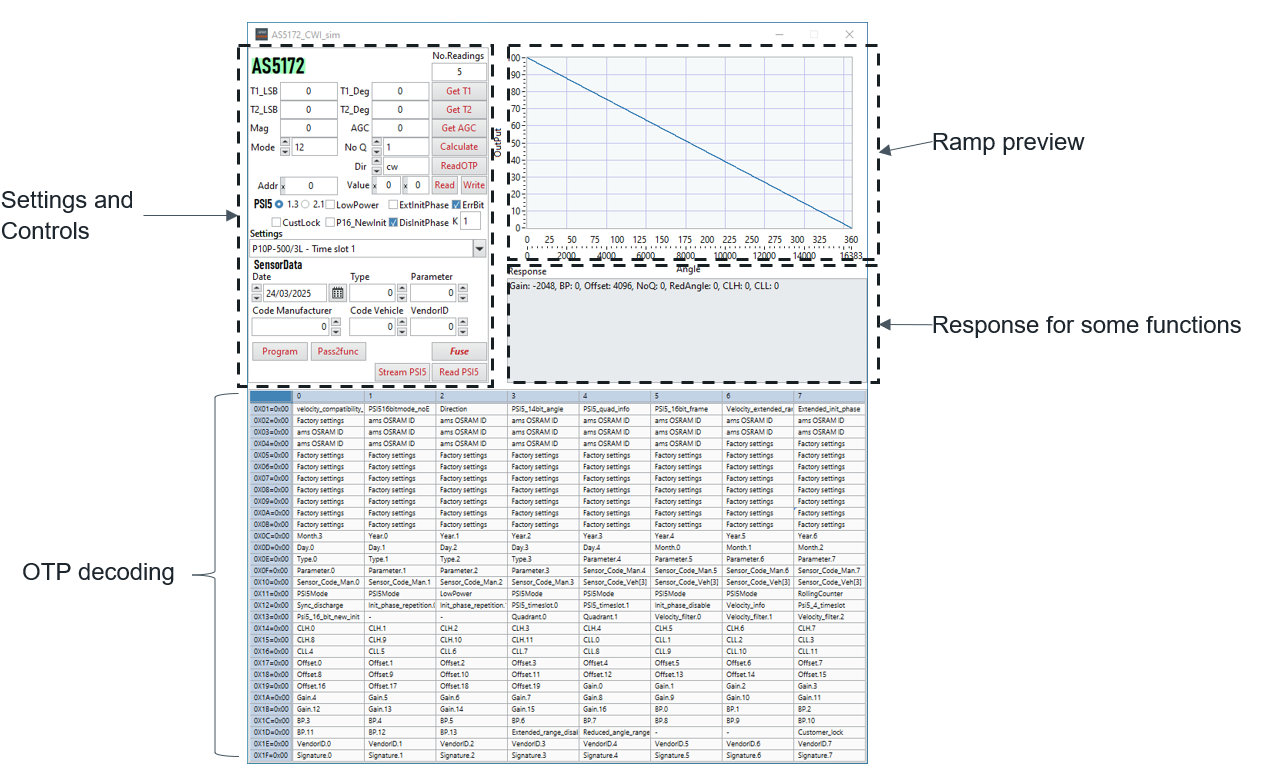
It has 4 components
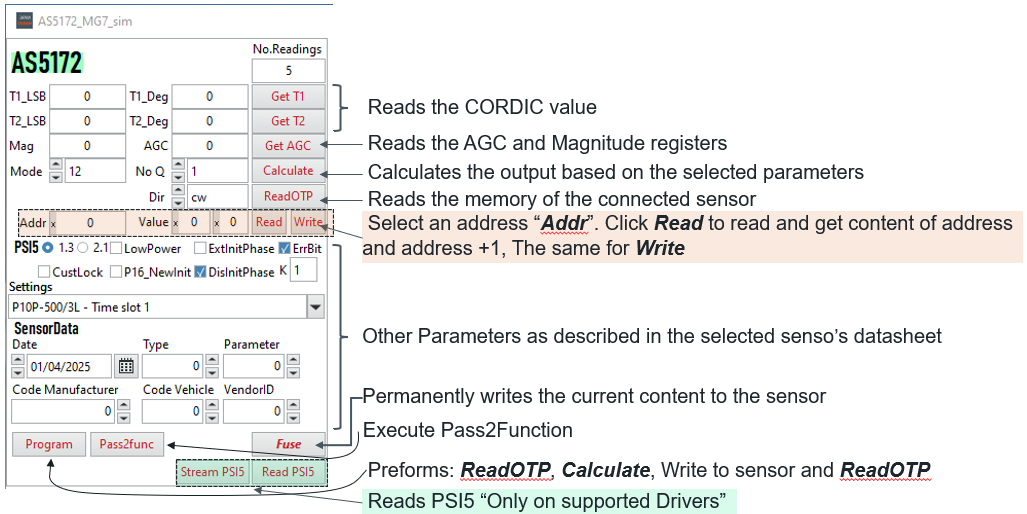
Controls and settings: It sets all desired settings and have all the controls.
In the image below an example of the Controls and settings with explanation of each function
Ramp Preview: Shows the output based on the user’s input.
Response: Shows a feedback to certain functions.
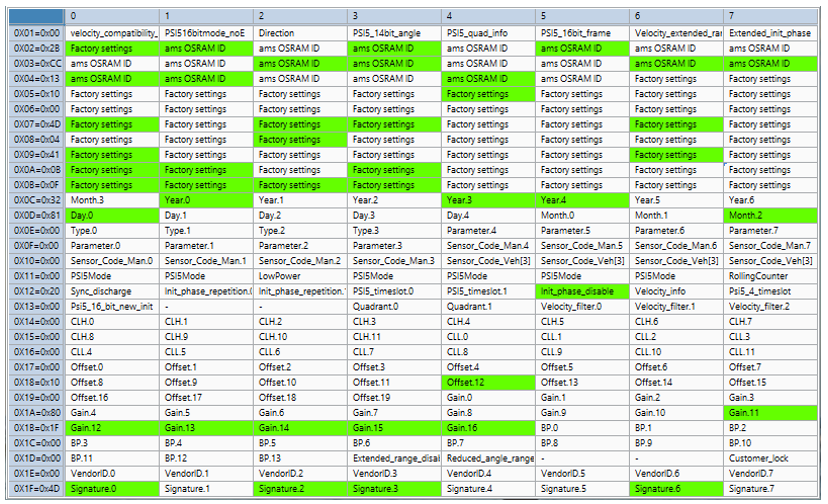
OTP decoding: Shows the device memory after each read or write operation.
In the image below, the OTP of device is shown. If a bit is green it means it has 1 otherwise a zero is written to it.:
The GUI allows multiple connections at the same time. So if two or more drivers are connected to the PC, both of them can be initiated.
The main GUI as in the image below, has a drop down menu (1), that shows all the opened instances:
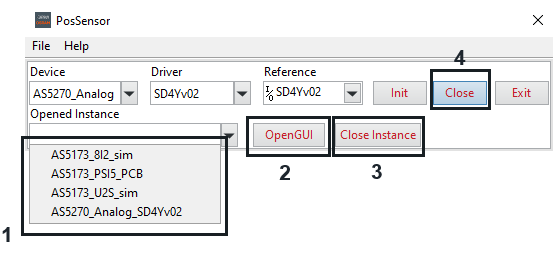
By clicking on OpenGUI (2), the Device GUI will come to the front. Close instance will close the selected and make the driver free.
If the user wants to close all the opened instances, Close button (4) can be used.
The Device GUI uses the same names and terminology according to the datasheet.