This library provides functions for interfacing with the XENSIV™ BGT60TRxx 60 GHz FMCW Radar Sensors. This library can be set up to use the ModusToolbox™ HAL interface, or using user-provided communication functions. For more information about the XENSIV™ Radar Sensor please visit the Infineon web page on radar sensors.
The BGT60TR13C Datasheet is available as part of Radar Development Kit which can be obtained through the Infineon Developer Center.
Once the Radar Development Kit is installed using the Infineon Developer Center follow the next steps to locate the BGT60TR13C Datasheet:
- Start the Radar Development Kit using Infineon Developer Center.
- Scroll down to Packages section. Download the Documentation package.
- Unzip the file RDK-Package.zip and open the BGT60TR13C Datasheet V2.4.6 document.
Quick start
For the hardware setup, see the Radar development kit user guide.
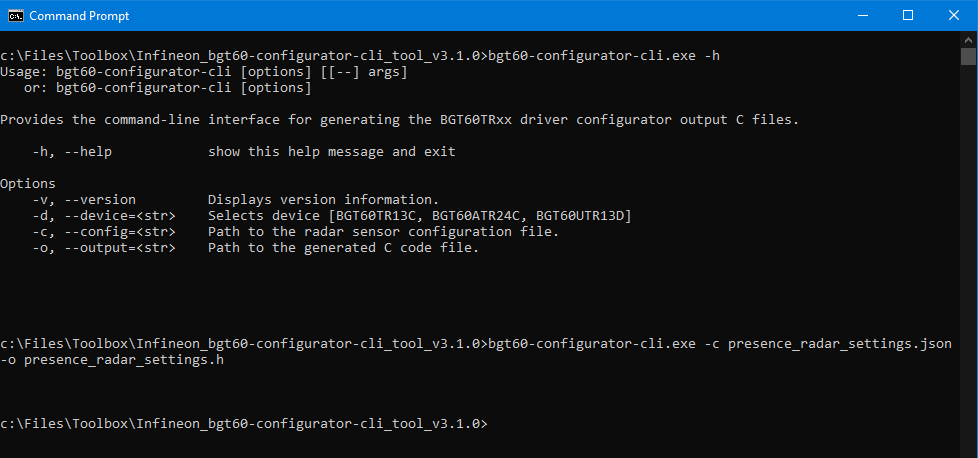
The initialization of the XENSIV™ BGT60TRxx radar sensor requires a list of registers that can be generated using the bgt60-configurator-cli tool.
The bgt60-configurator-cli is available part of Radar Development Kit which can be obtained through the Infineon Developer Center.
Once the Radar Development Kit is installed using the Infineon Developer Center follow the next steps to locate the bgt60-configurator-cli tool:
- Start the Radar Development Kit using Infineon Developer Center.
- Scroll down to Packages section. Download the Software package.
- Unzip the file RDK-TOOLS-SW.zip and browse into Tools folder.
The bgt60-configurator-cli tool takes as input a configuration file in JSON format specifying the radar parameters:
{
"device_config": {
"fmcw_single_shape": {
"rx_antennas": [1],
"tx_antennas": [1],
"tx_power_level": 31,
"if_gain_dB": 60,
"lower_frequency_Hz": 61020098000,
"upper_frequency_Hz": 61479902000,
"num_chirps_per_frame": 1,
"num_samples_per_chirp": 128,
"chirp_repetition_time_s": 7e-05,
"frame_repetition_time_s": 5e-3,
"sample_rate_Hz": 2330000
}
}
}
Note: For the functionality of the following example, ADC channel 1 must be active because the data test mode works only on this channel. See the rx_antennas
item in the configuration file.
Save the configuration as presence_radar_settings.json.
To generate the register file run in a command line window:
./bgt60-configurator-cli -c presence_radar_settings.json -o presence_radar_settings.h
Figure 1. bgt60-configurator-cli tool
Follow the steps below to create a simple application that checks basic functionality and connectivity to the radar sensor. The application configures the sensor according to the user defined configuration, enables the sensor test pattern generator on chip for data transfer check, starts the frame generation and compares the obtained data from the radar sensor on antenna RX1 against the defined bit sequence defined by the sensor test pattern generator.
- Create an empty ModusToolbox application for your board, e.g. CYSBSYSKIT-DEV-01.
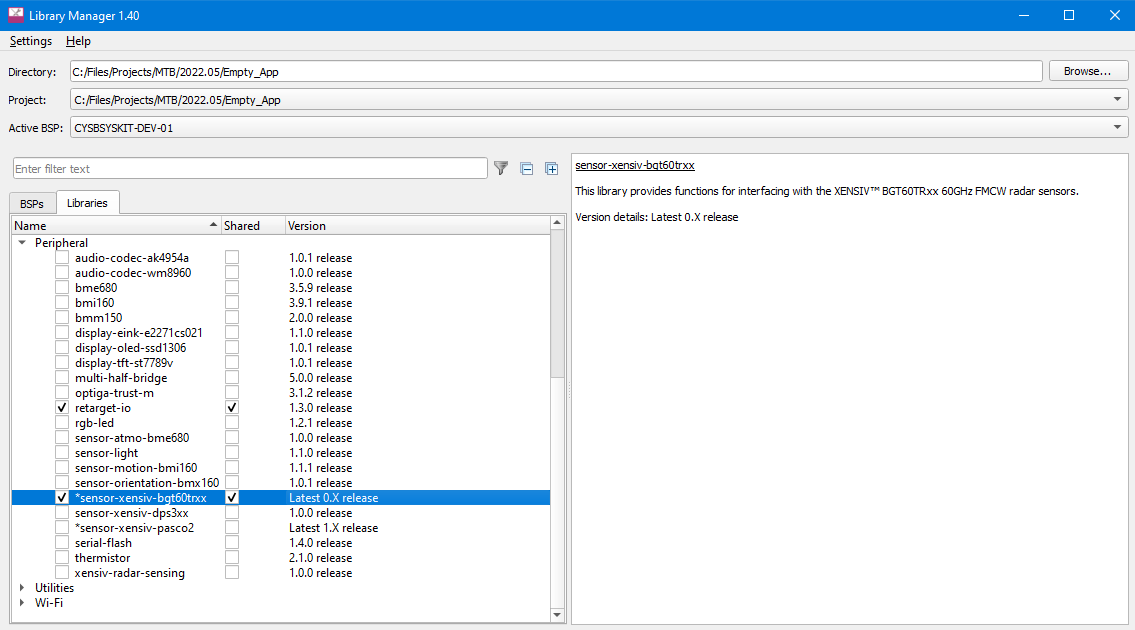
Add this library, i.e. sensor-xensiv-bgt60trxx, to the application using the Library Manager.
Figure 2. Library Manager
- Add the retarget-io library using the Library Manager.
- Define the following as as appropriate for your hardware/kit configuration:
- Place the following code in the main.c file.
#include <inttypes.h>
#include "cyhal.h"
#include "cybsp.h"
#include "cy_retarget_io.h"
#include "xensiv_bgt60trxx_mtb.h"
#define XENSIV_BGT60TRXX_CONF_IMPL
#include "presence_radar_settings.h"
#define PIN_XENSIV_BGT60TRXX_SPI_SCLK CYBSP_SPI_CLK
#define PIN_XENSIV_BGT60TRXX_SPI_MOSI CYBSP_SPI_MOSI
#define PIN_XENSIV_BGT60TRXX_SPI_MISO CYBSP_SPI_MISO
#define PIN_XENSIV_BGT60TRXX_SPI_CSN CYBSP_SPI_CS
#define PIN_XENSIV_BGT60TRXX_IRQ CYBSP_GPIO10
#define PIN_XENSIV_BGT60TRXX_RSTN CYBSP_GPIO11
#define PIN_XENSIV_BGT60TRXX_LDO_EN CYBSP_GPIO5
#define XENSIV_BGT60TRXX_SPI_FREQUENCY (25000000UL)
#define NUM_SAMPLES_PER_FRAME (XENSIV_BGT60TRXX_CONF_NUM_RX_ANTENNAS *\
XENSIV_BGT60TRXX_CONF_NUM_CHIRPS_PER_FRAME *\
XENSIV_BGT60TRXX_CONF_NUM_SAMPLES_PER_CHIRP)
static cyhal_spi_t cyhal_spi;
static volatile bool data_available = false;
static uint16_t samples[NUM_SAMPLES_PER_FRAME];
#if defined(CYHAL_API_VERSION) && (CYHAL_API_VERSION >= 2)
void xensiv_bgt60trxx_mtb_interrupt_handler(void *args, cyhal_gpio_event_t event)
#else
void xensiv_bgt60trxx_mtb_interrupt_handler(void *args, cyhal_gpio_irq_event_t event)
#endif
{
CY_UNUSED_PARAMETER(args);
CY_UNUSED_PARAMETER(event);
data_available = true;
}
int main(void)
{
cy_rslt_t result = CY_RSLT_SUCCESS;
result = cybsp_init();
CY_ASSERT(result == CY_RSLT_SUCCESS);
__enable_irq();
result = cy_retarget_io_init(CYBSP_DEBUG_UART_TX, CYBSP_DEBUG_UART_RX, CY_RETARGET_IO_BAUDRATE);
CY_ASSERT(result == CY_RSLT_SUCCESS);
printf("XENSIV BGT60TRxx Example\r\n");
result = cyhal_spi_init(&cyhal_spi,
PIN_XENSIV_BGT60TRXX_SPI_MOSI,
PIN_XENSIV_BGT60TRXX_SPI_MISO,
PIN_XENSIV_BGT60TRXX_SPI_SCLK,
NC,
NULL,
8,
CYHAL_SPI_MODE_00_MSB,
false);
CY_ASSERT(result == CY_RSLT_SUCCESS);
Cy_GPIO_SetSlewRate(CYHAL_GET_PORTADDR(PIN_XENSIV_BGT60TRXX_SPI_MOSI),
CYHAL_GET_PIN(PIN_XENSIV_BGT60TRXX_SPI_MOSI), CY_GPIO_SLEW_FAST);
Cy_GPIO_SetDriveSel(CYHAL_GET_PORTADDR(PIN_XENSIV_BGT60TRXX_SPI_MOSI),
CYHAL_GET_PIN(PIN_XENSIV_BGT60TRXX_SPI_MOSI), CY_GPIO_DRIVE_1_8);
Cy_GPIO_SetSlewRate(CYHAL_GET_PORTADDR(PIN_XENSIV_BGT60TRXX_SPI_SCLK),
CYHAL_GET_PIN(PIN_XENSIV_BGT60TRXX_SPI_SCLK), CY_GPIO_SLEW_FAST);
Cy_GPIO_SetDriveSel(CYHAL_GET_PORTADDR(PIN_XENSIV_BGT60TRXX_SPI_SCLK),
CYHAL_GET_PIN(PIN_XENSIV_BGT60TRXX_SPI_SCLK), CY_GPIO_DRIVE_1_8);
result = cyhal_spi_set_frequency(&cyhal_spi, XENSIV_BGT60TRXX_SPI_FREQUENCY);
CY_ASSERT(result == CY_RSLT_SUCCESS);
result = cyhal_gpio_init(PIN_XENSIV_BGT60TRXX_LDO_EN,
CYHAL_GPIO_DIR_OUTPUT,
CYHAL_GPIO_DRIVE_STRONG,
true);
CY_ASSERT(result == CY_RSLT_SUCCESS);
(void)cyhal_system_delay_ms(5);
&cyhal_spi,
PIN_XENSIV_BGT60TRXX_SPI_CSN,
PIN_XENSIV_BGT60TRXX_RSTN,
register_list,
XENSIV_BGT60TRXX_CONF_NUM_REGS);
CY_ASSERT(result == CY_RSLT_SUCCESS);
NUM_SAMPLES_PER_FRAME,
PIN_XENSIV_BGT60TRXX_IRQ,
CYHAL_ISR_PRIORITY_DEFAULT,
xensiv_bgt60trxx_mtb_interrupt_handler,
NULL);
CY_ASSERT(result == CY_RSLT_SUCCESS);
{
CY_ASSERT(0);
}
{
CY_ASSERT(0);
}
uint32_t frame_idx = 0;
for(;;)
{
while (data_available == false);
data_available = false;
{
for (int32_t sample_idx = 0; sample_idx < NUM_SAMPLES_PER_FRAME; ++sample_idx)
{
if (test_word != samples[sample_idx])
{
printf("Frame %" PRIu32 " error detected. "
"Expected: %" PRIu16 ". "
"Received: %" PRIu16 "\n",
frame_idx, test_word, samples[sample_idx]);
CY_ASSERT(0);
}
}
}
printf("Frame %" PRIu32 " received correctly\n", frame_idx);
frame_idx++;
}
}
- Connect the board to your PC using the provided USB cable through the KitProg3 USB connector.
- Open a terminal program and select the KitProg3 COM port. Set the serial port parameters to 8N1 and 115200 baud.
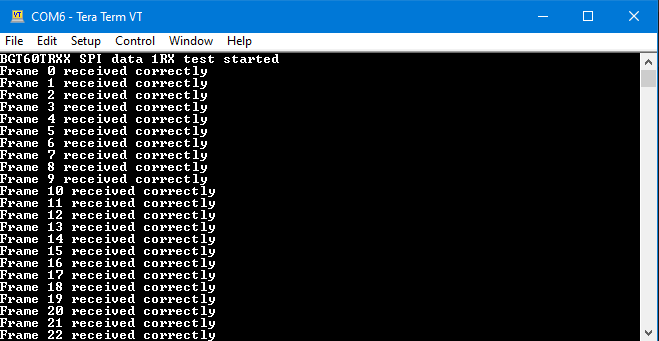
Build the application and program the kit. After programming, the application starts automatically.
Figure 3. Terminal output on program startup
Using the library for your own platform
The library can be used in your own platform copying the following files to your project:
- xensiv_bgt60trxx.c
- xensiv_bgt60trxx.h
- xensiv_bgt60trxx_platform.h
- xensiv_bgt60trxx_regs.h
The library depends on platform-specific implementation of functions declared in xensiv_bgt60trxx_platform.h:
uint8_t* tx_data,
uint8_t* rx_data,
uint32_t len);
uint16_t* rx_data,
uint32_t len);
See an example implementation for the platform-specific functions in xensiv_bgt60trxx_platform.c using the PSoC™ 6 HAL.
More information